How Much Drywall Should Be Removed Above a Flood or Baseboard Leak (12″ Rule)?
{“title”:”How Much Drywall Should Be Removed Above a Flood or Baseboard Leak (12\” Rule)?”}
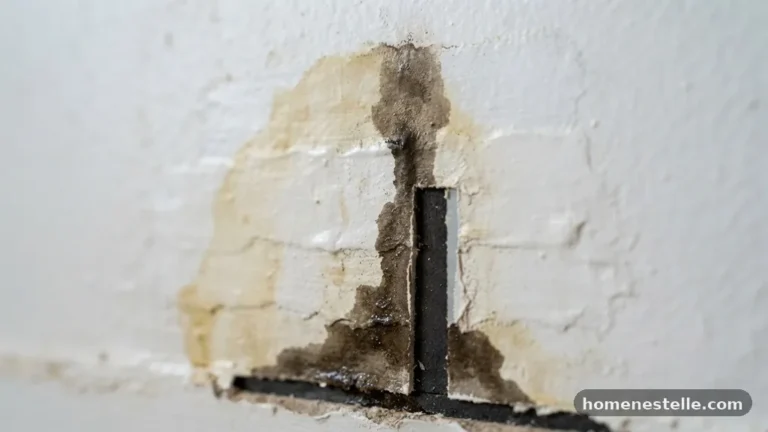
When water intrusion affects your home, determining how much drywall should be removed above a flood or baseboard leak (12″ rule) is the most critical step to preventing long-term structural issues. While many homeowners assume they only need to remove the visibly damp material, the reality is that water wicks upwards through gypsum and insulation, creating hidden pockets of moisture.
Understanding the standard 12-inch rule helps you navigate the immediate aftermath of a plumbing failure or storm surge while minimizing unnecessary demolition. By following established remediation protocols, you protect your property from mold colonization and wood rot that often thrive in concealed wall cavities long after the standing water has receded.
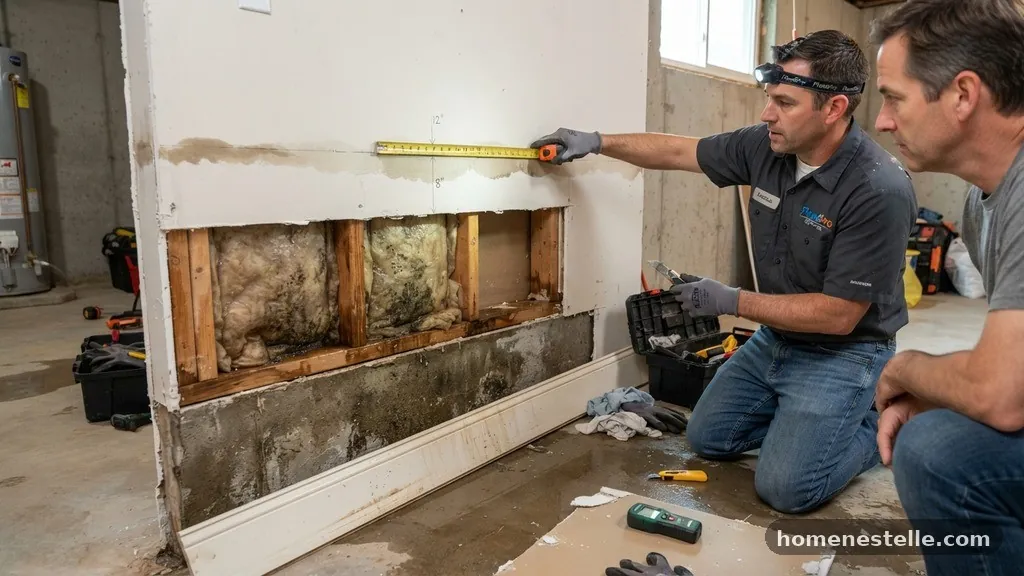
To answer the central question immediately: you should remove at least 12 inches of drywall above the highest point of visible water damage. This measurement is widely considered the industry standard because it provides a safety buffer for moisture wicking.
If the water reached a height of 4 inches, you should cut the wall at 16 inches from the floor to ensure you are well above the saturation line. Always err on the side of caution; if the wall feels damp or soft several inches above the visible stain, extend your cut until you hit completely dry, sound material.
Understanding the Mechanics of Wicking
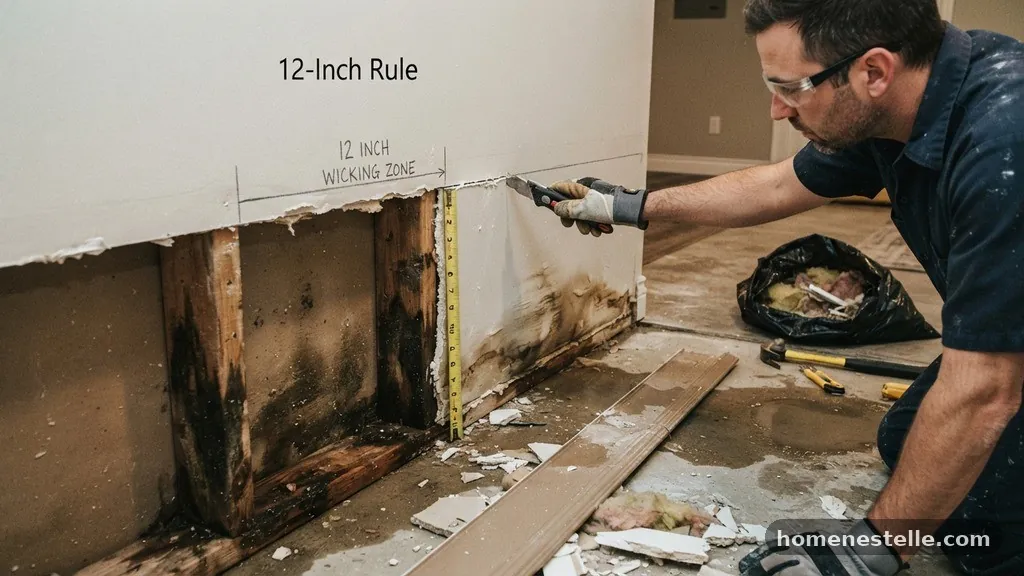
Drywall, specifically the gypsum core, acts like a sponge when it comes into contact with standing water. The paper facing on the panels facilitates a phenomenon known as capillary action, where water travels vertically against gravity through the material.
Even when the source of the leak is stopped, the moisture trapped inside the gypsum can remain for weeks. This is why a simple surface dry is never sufficient for a water-damaged wall.
The wicking process does not stop at the drywall itself. It often spreads to the wooden studs and any fiberglass or mineral wool insulation packed inside the wall cavity.
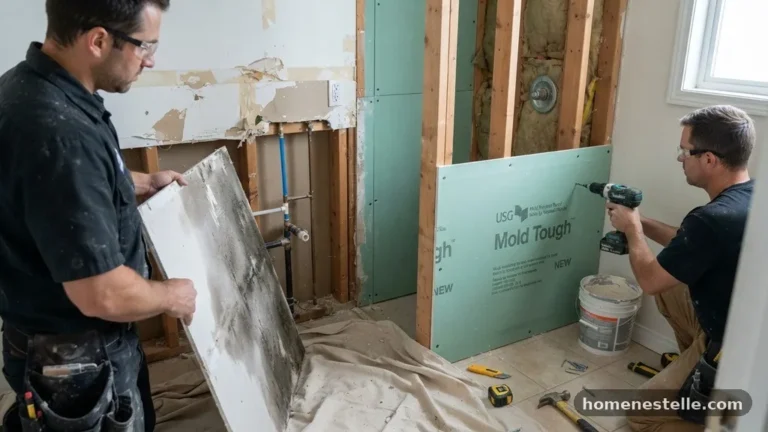
Insulation is particularly problematic because it holds moisture against the framing, which can lead to structural decay. By adhering to the 12-inch rule, you gain the clearance necessary to inspect the studs and remove compromised insulation that would otherwise remain a breeding ground for mold.
Why the 12-Inch Guideline Exists
The 12-inch rule serves as a practical baseline for restoration professionals and homeowners alike. It provides enough physical space to work with tools, such as a reciprocating saw or a utility knife, without damaging the framing or electrical wiring hidden behind the panel. Furthermore, it ensures that you aren’t just removing the wet material but also the area immediately surrounding it where potential contaminants might have traveled.
This buffer zone is essential for air circulation. After the initial demolition, the wall cavity must be exposed to high-volume air movement to reach a state of equilibrium with the surrounding environment.
If you cut too close to the moisture line, you risk leaving behind pockets of elevated humidity. A 12-inch margin allows for proper airflow, ensuring that the remaining structure can be effectively dried by industrial dehumidifiers and air movers.
Identifying Water Damage Categories
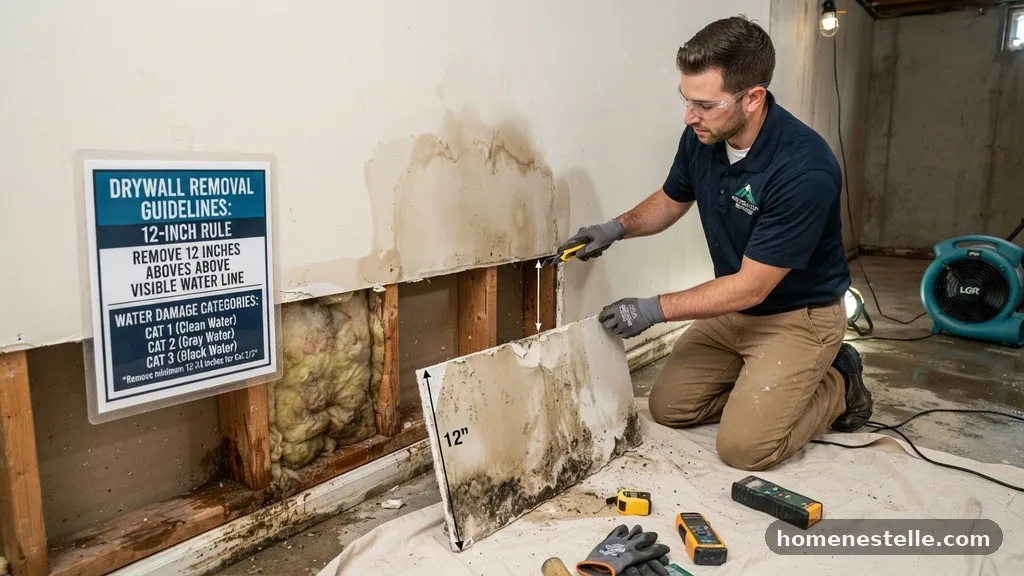
Not all water is created equal, and the source of the leak dictates the urgency of your response. Industry standards, such as those provided by the Institute of Inspection Cleaning and Restoration Certification, classify water damage into three distinct categories. Understanding these categories is vital for your health and safety when performing a flood cut.
| Category | Description | Action Required |
|---|---|---|
| Category 1 | Clean water from a supply line or pipe. | Remove wet materials, dry, and disinfect. |
| Category 2 | Grey water containing contaminants like dishwater. | Remove non-porous items and porous materials like drywall. |
| Category 3 | Black water from sewage or flood surges. | Full professional remediation and disposal required. |
Category 3 water is hazardous and often requires the removal of all porous materials, regardless of the 12-inch rule. If your baseboard leak involved sewage, do not attempt to salvage the drywall. In such cases, the entire wall paneling should be removed to prevent biological contamination from settling into the wall cavity.
Safety First During Demolition
Before you pick up a saw to perform a flood cut, you must address the hidden dangers inside your walls. The most significant risk is electrical wiring, which is often routed through the studs at heights that overlap with the area you need to remove. Always turn off the power at the main breaker panel for the affected area before cutting into the wall.
You should also be aware of potential hazards like gas lines, plumbing pipes, and even structural bracing that might be hidden. Using a stud finder or a small inspection camera can help you identify what lies beneath the surface. If you are unsure about what is behind the drywall, use a manual keyhole saw rather than a power tool to maintain better control and prevent deep, dangerous cuts into unseen infrastructure.
Tools Required for the Job
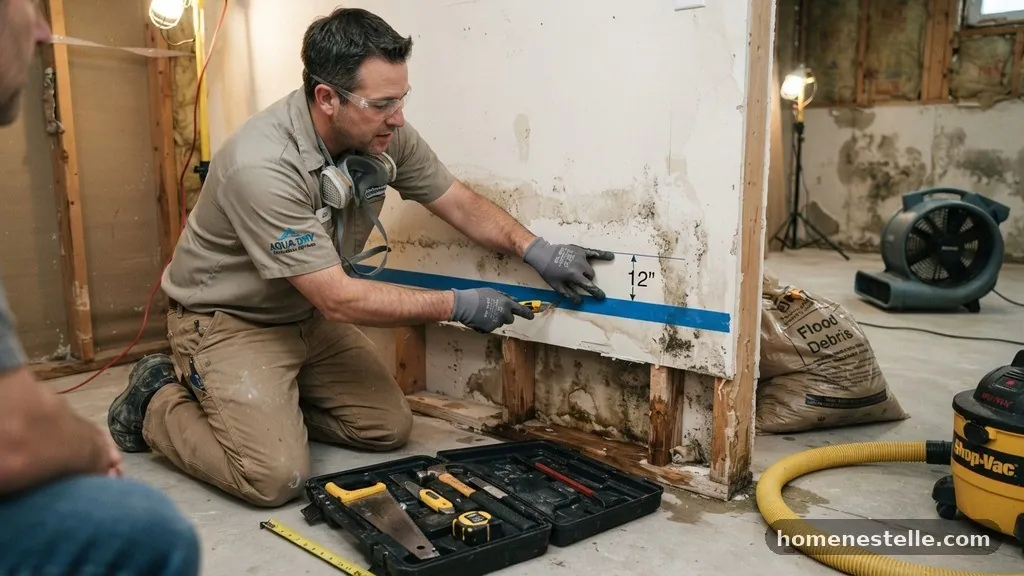
Performing a proper flood cut requires a specific set of tools to ensure the job is done cleanly and safely. Having the right equipment reduces the time you spend in the affected space and ensures you don’t create unnecessary mess. You will need basic personal protective equipment (PPE), including an N95 respirator, gloves, and eye protection, to guard against mold spores and debris.
- Utility knife with fresh, sharp blades for scoring the drywall paper.
- Keyhole saw or drywall hand saw for making precise, controlled cuts.
- Pry bar to remove baseboards and wall panels without damaging the studs.
- Stud finder to locate framing before you begin cutting.
- Heavy-duty trash bags for immediate disposal of water-damaged materials.
- Moisture meter to verify when the framing has truly reached a dry state.
Using a moisture meter is perhaps the most overlooked step in the process. It allows you to move beyond guesswork and confirm that the wood framing is safe to close back up. If the wood moisture content is significantly higher than the surrounding ambient wood, you must continue the drying process before installing new drywall.
Insulation and Wall Cavity Assessment
Once the drywall has been removed, you must evaluate the insulation. If you have fiberglass batt insulation, it is almost impossible to dry it effectively after it has been submerged.
Even if it feels only slightly damp, it can harbor mold or lose its thermal efficiency permanently. Most professionals recommend removing and discarding any insulation that has come into contact with floodwater.
With the cavity exposed, take the time to inspect the framing for signs of rot or warping. If the wood remains dark or soft to the touch after several days of drying, it may require treatment with an antimicrobial agent. In extreme cases of prolonged exposure, some studs may need to be replaced entirely to ensure the structural integrity of the wall.
Professional Drying Versus DIY
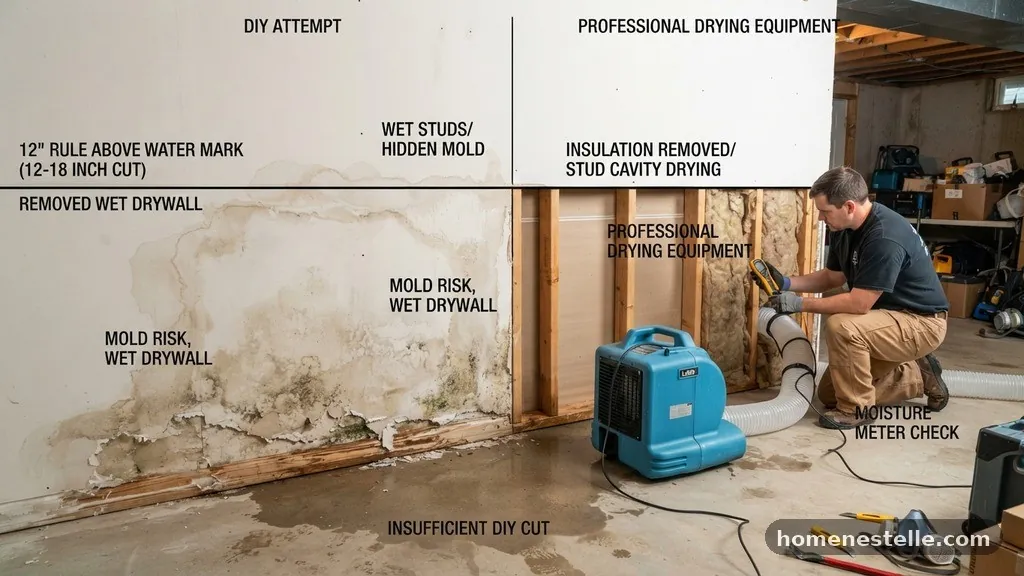
While many homeowners are comfortable performing a basic flood cut, professional drying services offer equipment that is significantly more efficient than standard household fans. Industrial dehumidifiers pull moisture out of the air at a much higher rate, which is necessary to prevent secondary damage throughout the rest of your home. If the leak was extensive, relying solely on open windows and box fans is often insufficient.
A professional contractor will also have the tools to measure the moisture content of subflooring and rim joists. These areas often trap water that is not immediately visible, leading to long-term issues like warped flooring or warped baseboards. If you notice signs of moisture spreading to adjacent rooms or the floor, it is time to call in a professional to assess the extent of the damage.
Mold Prevention Strategies
Mold can begin to grow on wet organic materials within 24 to 48 hours of exposure. Removing the drywall is only the first step in the fight against fungal colonization.
After the material is removed, the exposed wall cavity must be cleaned and disinfected. Use an EPA-approved antimicrobial solution to wipe down the studs and any remaining wall components.
Do not be tempted to seal the wall back up until you are certain the cavity is bone-dry. Covering a damp wall cavity creates an incubator for mold, which can lead to significant health issues and expensive remediation later. If you are ever in doubt about the dryness of the wall, err on the side of leaving the area exposed for a few extra days.
The Importance of Proper Documentation
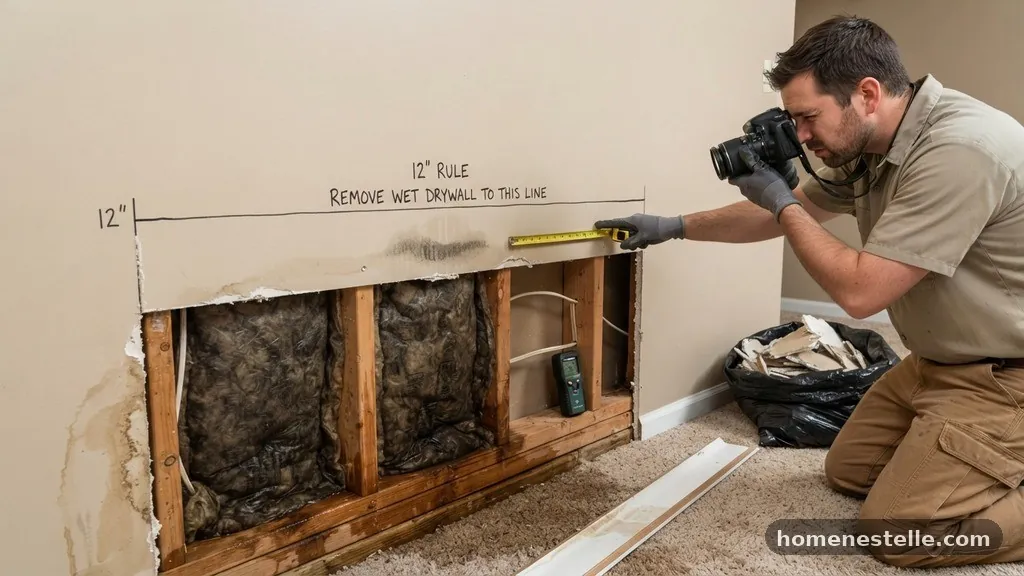
If you are dealing with a leak that will be covered by a home insurance claim, documentation is your best friend. Take clear, high-resolution photographs of the damage before you start any work.
Measure the height of the water line and document the extent of the removed material. This evidence is crucial for your adjuster to understand the scope of the repairs.
Keep a detailed log of the steps you took, including the date you stopped the water, the height of your cuts, and any materials that were discarded. If you hire a professional company to assist with the drying process, keep copies of their moisture readings and reports. Good record-keeping can make the difference between a smooth claim process and a denied one.
FAQ: Addressing Common Concerns
Is the 12-inch rule mandatory for all types of water leaks?
The 12-inch rule is a guideline rather than a strict law, but it is the industry standard for a reason. If your leak was a minor spray from a pipe, you might get away with a smaller cut, but if the water was standing on the floor, 12 inches is the minimum required to clear the wicking zone.
Can I reuse the drywall I cut out?
No, you should never attempt to reuse drywall that has been soaked by a flood or a baseboard leak. Once the gypsum core has been exposed to water, its structural integrity is compromised, and it will almost certainly contain mold spores that are impossible to fully remove.
What happens if I don’t remove the wet drywall?
Leaving wet drywall in place is a recipe for disaster. The moisture will continue to travel upward, damaging your wall studs and creating a persistent mold problem that can affect your indoor air quality and eventually rot the framing of your home.
How do I know if the wall is dry enough to patch?
You should use a professional-grade moisture meter to check the moisture content of the wall studs. A reading below 15-16% is typically considered acceptable for drywall installation, but ideally, you want the wood to match the moisture content of unaffected areas in your house.
Should I replace the baseboards as well?
Baseboards are usually made of wood or MDF and are highly susceptible to water absorption. In most cases, these should be removed and replaced, as they will likely warp or develop mold after being soaked by a floor-level leak.
Ensuring a Successful Restoration
Determining how much drywall should be removed above a flood or baseboard leak (12″ rule) is the foundational step toward restoring your home to a healthy state. By removing at least 12 inches of material, you ensure that you have cleared the wicking zone and provided the necessary space for the wall cavity to dry out completely. This process, while disruptive, is the most effective way to prevent the long-term hazards of mold and structural decay.
Always remember that the goal of this removal is to protect the health of your home and its occupants. If you are ever unsure about the extent of the damage or the safety of the structure, do not hesitate to contact a professional.
Taking the time to do the job right the first time will save you from much larger headaches in the future. Feel free to reach out if you have specific questions about your situation or need further guidance on the drying process.